How To Make Lanyards
Did you realize that you can create the same lanyards at home that you find at www.lanyardstore.com? Purchasing lanyards can be less expensive and hassle free. However, if timing is a constraint or you are looking for creative and unique craft ideas; creating lanyards is fun and easy to teach to children and adults. At www.lanyardstore.com, we love frugal creativity! There are so many ideas and different ways to make a lanyard, but for now we will focus on two basic types: the commercial style lanyard and the cosmetic style lanyard.
Commercial lanyard types we will create:
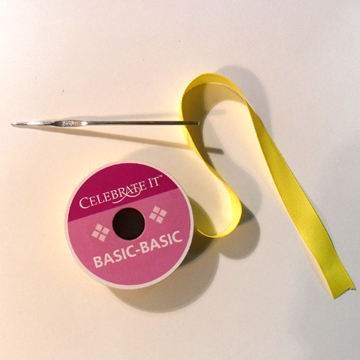
I. Lanyard with a wooden slider.
II. Lanyard with a button and fasteners.
III. Lanyard with a metal crimping mechanism.
Suggested commercial lanyard craft hardware:
1. 3/8” to 1” width by 36” length shoelaces, ribbon, (or any flat and sturdy type of material).
2. Crochet or knitting stick with a hook mechanism.
3. Wooden slider, button with fastener, or metal crimps.
4. Key ring.
5. Metal crimping mechanism.
5. Scissors and/or a lighter.
6. Pliers or a hammer.
7. Logo stamps or stickers if desired.
Suggested hardware suppliers:
1. Michaels
2. Hobby Lobby
3. Target
4. Home Depot
5. Any on-line craft supplier
How To Make A Wooden Slider Lanyard
For the simplest of the commercial lanyards you will need: 3/8” to 1” width X 36” length (shoelace, ribbon, or any flat and sturdy type of hardware), a crochet or knitting stick with a hook mechanism, key ring, scissors, and a wooden slider.
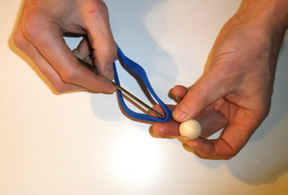 1. Choose a 36” length of chosen sturdy fabric. Match the two loose ends together so that the opposite end forms a loop and lay this down on your working surface.
2. Push your crocheting needle or chosen device, hooked end first, through the center (or hole) in the wooden slider.
3. Pick up the fabric from the looped end, attaching the crochet hook, and pull the fabric back through the hole in the wooden slider. The loop should be about ¼” in diameter.
4. To place the key ring on the looped or closed end of the fabric below the wooden slider; pull one of the two open ends slightly apart using your finger and thumb.
5. Slide the looped end of the fabric through the opening and release.
6. Continue pulling the fabric until it is no longer pinched between the ring, but flows freely in the center of the key ring hole.
7. Tie the loose ends of the fabric in a knot.
8. Use scissors or a lighter to take off any excess fabric where the loose ends have been joined in a knot.
9. Place the lanyard around your neck as a useful tool.
How To Make A Lanyard With A Button And Fastener
Another relatively simple type of commercial lanyard requires: A 3/8” to 1” width X 36” length (shoelace, ribbon, or any flat and sturdy type of hardware), a crochet or knitting stick with a hook mechanism, key ring, scissors, and a button with a fastener (that acts like a staple).
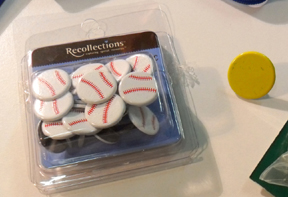
1. Select a 36” length of chosen sturdy fabric, match the two loose ends together so that the opposite end forms a loop and hold in one hand.
2. With the other hand, press the two parallel and sharp fasteners through both strands of parallel fabric ¼” to 1” above the looped or closed end. This will act as a staple that holds the two pieces of lanyard fabric together.
3. Once you have pierced the fabric with the button fastener, turn the lanyard over so that the parallel fasteners are standing upwards vertically while the 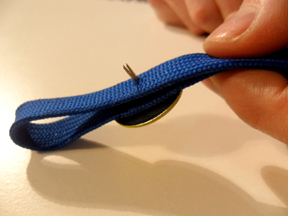 button lays flat on the working surface, underneath the two pieces of joined fabric.
4. To secure the button onto the lanyard material, use either your fingers or a flat metal object such as a small chisel to press each fastening wing down against the fabric in opposite directions from one another. If the fastening wings have been pressed down correctly, they should form one straight line at the 3 o’clock and 9 o’ clock position or at the 6 o’ clock and 12 o’ clock position.
5. Press hard to make sure the button is secure.
6. Tie the loose ends of the fabric in a knot.
7. Use scissors or a lighter to take off any excess fabric where the loose ends have been joined in a knot.
8. Place the lanyard around your neck as a useful tool.
How To Make A Trade Show Style Lanyard With A Crimp
The last type of commercial lanyard we will talk about making is the trade show lanyard. This project will require a ¾” width X 36” length sturdy ribbon of any color, a crimping tool such as pliers, a crochet or knitting stick with a hook mechanism, key ring, scissors, and a metal crimp of chosen size.
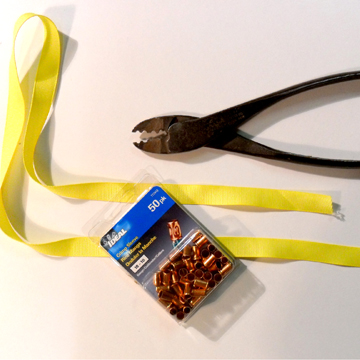
1. First, take the 3/4” width by 36” length of ribbon material and match the two loose ends together so that the opposite end forms a large 4” loop. Place this down on your working surface.
2. Next, place the crimp on the hooked end of the crocheting needle.
3. With one hand, pick up your ribbon with the 4” looped end. With your other hand, grab the looped end of the ribbon with the hook, and pull it through the crimp.
4. Once the crimp is on, carefully push your crocheting needle back through the crimp with the crochet hook coming from the looped end and going 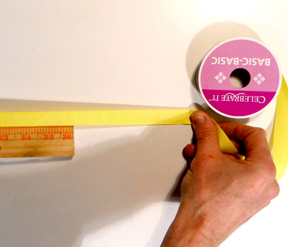 towards the loose ends of the fabric.
5. Next, grab one of the loose ends of ribbon with the crocheting hook and pull it back through the same direction you just came in step 4 towards the closed or looped end. If this is done correctly, you should end up with a bow tie.
6. Attach the key ring onto the looped end of the fabric below the metal crimp by pulling one of the two open ends slightly apart using your middle finger and thumb.
7. Slide the looped end of the fabric through the opening and release.
8. Continue pulling the fabric until it is no longer pinched between the ring, and flows freely in the center of the key ring hole.
9. Once the key ring is secured on the designated bow tie, slowly and gently begin to pull both of the loose ends toward the crimp one at a time; without letting the ends pull through the crimp completely. If the ends pull through the crimp, you will have undone your knot and will need to start over.
10. If step 9 is successful, the loose ends of the ribbon should stick out ¼” from the crimp. 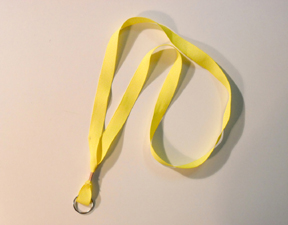
11. To secure the key ring in place, pull the looped or closed end until it tightens down on the ring.
12. Use a crimping tool such as pliers to squeeze and tighten the crimp until it is immoveable.
13. As a final touch, use scissors to cut any excess ribbon and/or a lighter to burn the excess ribbon off.
14. Place the trade show style lanyard around your neck as a useful tool.
How To Make A Cosmetic Lanyard As A Craft
Cosmetic lanyard we will create:
I. Lanyard made from yarn and beads.
Suggested commercial lanyard craft hardware:
1. Any size and color yarn
2. Crochet or knitting stick with a hook mechanism
3. Any size, color, or variations of beads
5. Scissors
6. Key ring
Suggested hardware suppliers:
1. Michaels
2. Hobby Lobby
3. Target
4. Home Depot
5. Any on-line craft supplier
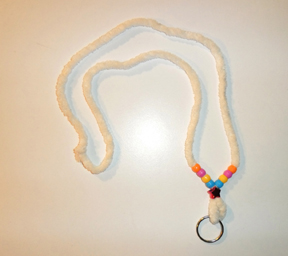
Lanyards, as a craft, date back to the 1950’s where they were used as an inexpensive creative outlet for children. Today, items such as beads, uncooked pasta noodles, or any meaningful object can be used to secure the loop of the lanyard. The last type of lanyard we will be instructing about is a cosmetic lanyard used for arts and crafts projects. This last setup will require: Any size and color yarn, a crochet or knitting stick with a hook mechanism, any size, color, or variations of beads, scissors, and a key ring.
1. Choose any color and size of yarn at a local hobby store or on-line.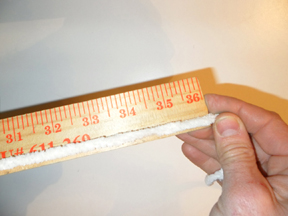
2. Choose any color and size of beads at a local hobby sore or on-line.
3. Using the scissors, cut the yarn down to 36”.
4. Match the two loose ends together so that the opposite end forms a loop; lay this down on your working surface.
5. Because yarn is not rigid, you will need to use your crocheting needle to pull the string; it cannot be pushed through the bead.
6. Place the bead onto the crocheting stick near the hooked end.
7. Then pull the looped or closed end of the lanyard tight with the hooked end of the crochet stick with one hand and use the other hand to pull the loose ends taut.
8. While the yarn is being pulled taught by both hands, use your thumb and forefinger of one hand to push the bead on the crochet stick over the looped end of the yarn ¼” away from the closed end.
9. Secure the key ring onto the looped end near the bead by pulling one of the two open ends slightly apart using your middle finger and thumb.
10. Slide the looped end of the fabric through the opening and release.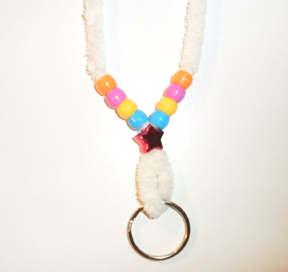
11. Continue pulling the fabric until it is no longer pinched between the ring, and flows freely in the center of the key ring hole.
12. Now you can be as creative as you want by adding more beads to each loose end of the lanyard. You can choose as many colors and styles as you like. Use the same process explained above for each of the two loose ends, being sure to pull the beads through; yarn is not rigid enough to push the beads through.
13. Tie the loose ends of the fabric in a knot.
14. Use scissors or a lighter to take off any excess fabric near the knot.
15. Place the lanyard around your neck as a creative accessory.
© 2011 Lanyardstore.com All Rights Reserved
Content protected by copyscape

